Monday, August 30, 2010

Chicken with Colors Bell Peppers


I always have leftover chicken breast either from the rotisserie chicken or the fried chicken that my hubby bought.  You can either make it into chicken salad for the chicken sandwich or just stir-fry it like me.  Since we eat rice almost daily, stir-frying the leftover is my way to reuse the food.

I loved to buy color bell peppers when it goes on sales.  We must eat with colors as different color of fruits and vegetables will give us a different nutrient that our body needs.  But it is hard to convince my girls to eat bell peppers and onion.  From my posting, I noticed that I have used less onion in my cooking these days because I took their dislike into consideration when preparing meal, even without realizing it.  I used to cook most dishes with onion.  Guess I need to bring back onion in my stir-frying.


Ingredients:

One piece of leftover chicken breast from the rotisserie chicken/ fried chicken, skinned and shredded
1/4 piece of a small green bell pepper, sliced
1/4 piece of a small red bell pepper, sliced
1/4 piece of a small yellow bell pepper, sliced
3 cloves of garlic, minced
Dark soy sauce, 1/2 Tbsp.
Soy sauce to taste
1/2 Tbsp. Sugar

Method:

1.  Heat up your wok.  When heated, add in some oil.  Add in garlic, fry until slightly golden, add in bell peppers and stir-fry a little.

2.  Add in shredded chicken, stir-fry well.  Just to heat up the chicken at this point.  Add the soy and dark sauces and sugar.  Coat and mix well.  Turn off heat and serve on a plate.

Friday, August 27, 2010

Pork with Marinated Bok Choy


I was given some marinated bok choy from our friend who owns a Chinese restaurant.  This marinated bok choy was prepared by the head chef in his restaurant.  I saw this dish prepared by the head chef and it looked really appetizing and I was trying to replicate it.  Typing this post now I just realized I forgot to add red pepper flakes and I shouldn't add water (as the bok choy will release water when cooking).  The head chef version was dry and his pork was sliced really thin and small.  Not sure what was his seasonings though, probably just salt and MSG?

Anyway, this is my version without the MSG.


This was the marinated bok choy that I received.  I used this to cook porridge and it was really good. What do you call this?


Ingredients:

1 boneless pork chop, thinly sliced and marinated with some Chinese wine, salt, white pepper, sugar and cornstarch.
2 big bunches of marinated bok choy, rinsed and cut into small pieces.
2 cm piece of ginger, thinly sliced
4 cloves of garlic, thinly sliced
Sprinkle of red pepper flakes (I added it here)
Salt to taste
Sugar to taste
Dark soy sauce, a touch

Method:

1.  Heat up the wok, when heated, add in some oil.  Add in ginger, stir-fry until fragrant, add in garlic and red pepper flakes, fry until garlic is slightly golden, add in pork and stir-fry until no longer pink.

2.  Add in marinated bok choy and stir-fry well.  Add seasonings to taste.  Serve hot!

Tuesday, August 24, 2010

Basic Waffles


I finally bought a waffle iron!  Well, if I don't look at brand and read at the reviews, I can get a waffle iron for fairly cheap here.  You can call it my impulse buying.  My girls like to have waffle for breakfast but the frozen ones in the supermarket have partially hydrogenated oil in them even thought they were listed as zero trans fat.  So, I stopped buying frozen waffles a while back.  Thus, the best way for me is to make my own waffle using the ingredients I know and serve it to my girls.  I found the bellow recipe at allrecipes.com and modified it a little to include more sugar and added honey so that my girls can eat the waffle as is.  No extra spread of butter or syrup needed.  I am going to play with this recipe more to create a healthier version like using whole wheat flour or oatmeal flour, etc.

As you can see, I already played with this basic recipe to add some chocolate chips.   Last batch, I added some cocoa powder as well.  This waffle is slight crispy on the outside and soft and fluffy on the inside.  It crisp up more when toast in the toaster.  Homemade is definitely the best way to go!


Recipe adapted from Allrecipes.com with slight modification.  For my waffle size, it yields 12 pieces.

Ingredients:
2 eggs 
(A) 
2 cups all-purpose flour
1 3/4 cups milk
1/2 cup vegetable oil
3 tablespoons white sugar
1 tablespoons honey (optional)
4 teaspoons baking powder
1/4 teaspoon salt
1 teaspoon vanilla extract

(B)
Chocolate chips as needed

Method:
1.  Preheat waffle iron.  Beat eggs in a large bowl with hand beater until fluffy.  Add in (A) and hand beat until smooth.  Or you can blend it in a blender until smooth.
2.  Spray preheated waffle iron with butter flavored cooking spray.  Use a ladle to drop some of the mix onto the hot iron.  Sprinkle with some chocolate chips (try to spread it even) and add a little more mix on top.  Cover and cook until golden brown.  How long to cook depends on the waffle iron you used, just keep watch.  Serve hot.

3.  Put the leftover in the freezer bag and freeze for whenever.  Just toast it in the toaster until crispy and brown.  Since I put the frozen one straight from the freezer to the toaster, I had to toast it 2 times, one to defroze and the next to crisp.

Sunday, August 22, 2010

Nagaimo Mung Bean Dessert


Nagaimo is also called 山药 or 淮山 in Chinese.  It is a type of yam that can be consume raw.  It has long been traditionally used as Chinese medicine and herbology.  They cut it and dried it in pieces for cooking Chinese herbal soup.  It's the white color herb that we called it 淮山.  I just learned that it has other name which is 山药 from my Chinese friends.  I learned this dessert from them as they gave me a container to try.  It was my first time tasting fresh Nagaimo, frankly I didn't like it as they cut it into big chunks.  It was similar to potato in taste but full of potassium, magnesium, zinc, vitamin C, vitamin B1, and more.  It is also low in calories and a high protein tuber.  I saw a Chinese cooking show, where they put cubed and blanched Nagaimo and Pumpkin into heated milk and serve it as breakfast.  Usually you can cook it like what you would normally cook a potato dish.


You can read more about Nagaimo here. And more about the nutritional facts here.

In this dessert, I diced the Nagaimo into small cubes so that it was easier for me.  Since I cooked it in a slow cooker, some of the Nagaimo was blended into the soup when stirring.  It still have pieces of Nagaimo but quite pleasant since it was not in big chunks.  Definitely a dessert I will be cooking if I buy Nagaimo again.


Ingredients:

Nagaimo, a segment of it (more or less depended on how much you like it)
1 cup of mung beans
A small piece of ginger, peeled and chopped into tiny pieces or leave it in big piece and smashed it if you want to take it out after cooking
Rock sugar to taste
Water to cover double the amount

The water amount that I used

Method:

1.  Peel the Nagaimo with a peeler (careful when holding it because very slimy and slippery), then rinse with tap water.  Diced into small pieces (you can cut it into bigger pieces if you like to eat it in chunks).

2.  Wash by rinsing the mung beans several times until the water is cleared.

3.  In a slow cooker, add in mung bean, chopped ginger, Nagaimo and cover with water.  Slightly more than double the amount.  Turn to high and let it cook for 3-4 hours, or until the mung beans are broken out.

4.  Add in rock sugar to taste.  Stir or wait until sugar dissolved.  Mix some potato starch with water, stir to mix well.  Slowly add into the dessert and stir until thicken.  If not thick enough, add more potato starch water.

5.  Good serving it warm or cold.  Keep the leftover in a container in the refrigerator to enjoy it cold.  Refreshing during Summer.  Or keep warm in the slow cooker to enjoy it warm.

Note:  You can cook this on the stove too, just have to keep watch.

Thursday, August 19, 2010

Merdeka Open House 2010: Tamarind Stew Pork with Daikon/ Chinese Radish


I have been participating in Merdeka Open House hosted by Babe in the City since the very beginning, so of course I cannot left this year out.  This year theme for Merdeka Open House 2010 is 
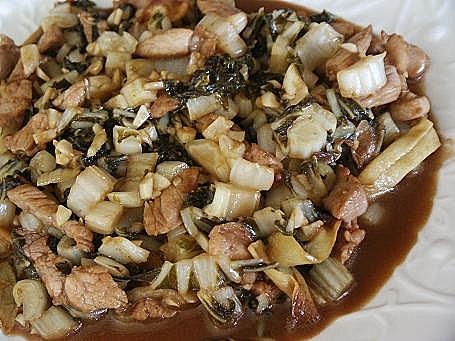
Food From Our Hearts.  A local dish that I love and is lovingly prepared by my loved ones and tell a story about it.  My mom is the cook in the family so of course I had to pick my mom's dish.  The most memorable dishes that I missed from my mom are Acar Hu (Pickle Fish) and this Tamarind Stew with daikon.  I really like her Acar Hu but I never made it before because of the limited fish choices over here.  This Tamarind Stew can be made with chicken which I did a while ago over here or pork which I did for this year open house.

I really have no idea where she learned this dish from or it is a pass it down recipe.  The taste just stick to me because I like the spiciness from the dried chili, the sourness from the tamarind juice, the sweetness from the brown sugar, the softness of the daikon, and the tenderness of the pork, it just blend so well together.  When I came over to the U.S. this was one of the dishes I missed so much that I had to call and ask my mom for her recipe so that I could enjoy this dish here.  I hardly cook this dish though because my hubby and daughters do not like Chinese radish or daikon at all, thus every time I cooked this, I was the only one who ate the daikon.  Well, actually more for me because I do enjoy the daikon very much.

When I was stewing this dish for this post, my husband came home from work and said something smell like shit in the house.  I had no idea why this dish smelled like shit to him because it smelled fragrant to me.  He had the hesitated look on his face.  But guess what, he ended out enjoying this dish, even came back for second and third.  See, never judge a dish when you haven't tasted it!

There is still time to participate in this event if you or your spouse is a Malaysian, just go to visit Babe KL's blog for more details.


Ingredients:

Some skinless and boneless pork, cut into chunk pieces
1 small daikon/ Chinese white radish, cut like below picture
8 dried red chili peppers, reconstituted in warm water, drained
15 pieces of dried tofu knots, soften in room-temp. water, drained (optional)
4 cloves of garlic, keep whole
2 cm of ginger, smashed

Sauces:
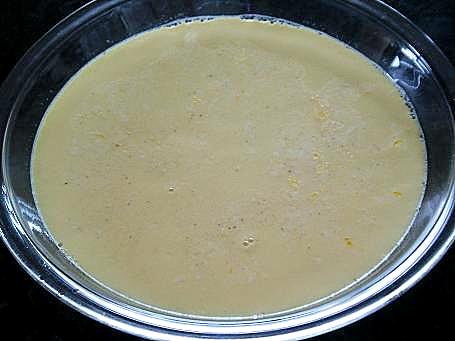
1 cup of tamarind juice
Dark soy sauce to taste (for color)
Soy Sauce to taste
Brown sugar, about 2-3 Tbsp.
1 tsp. salt

This should be how to you cut the daikon.  I don't know how to explain it in words so showing a picture here.

Method:

1.  In a stock pot, heat up with some oil.  Add in ginger and garlic, fry until slightly golden and fragrant.  Add in pork and dried chili and fry to brown the pork on the outside. 

2.  Add in tamarind juice and water to cover the pork.  Mix well and add in the rest of the sauces ingredients.  Add daikon, mix well.  Lastly add in tofu knots, mix well.  

3.  Turn the heat to low and let it simmer covered for 3 hours or until the pork is tender.  Add water along the way if needed.

Tuesday, August 17, 2010

Rose & Vanilla Spirals Cookies


I was asked for this recipe from a reader last week.  Actually, I made this cookie a while ago back in 2005 and it was out of experimentation.  And I never made it again until today because I had to test out the recipe first.  I made that cookie in 2005 with simply threw more of this here and there and see how it was created.  The original recipe used mint extract and green coloring or strawberry extract and red coloring but I ran out of strawberry extract thus had to use the closes substitute which was rose extract.  Because this rose extract was already red in color thus the coloring was omitted.


This cookie dough was a bit soft at room-temperature thus had to use the scraper to move the dough and helped along with the rolling.  The texture of this cookie is crispy and then sort of melt in the mouth in the end.

The picture of my old post cookies can be found here.  It has the mint version.


Ingredients:


(A)
1 cup unsalted butter, softened
3/4 cup powdered sugar

(B)
1/2 cup cornstarch
2 cups all-purpose flour
1 tsp. vanilla extract
A dash of salt


(C)
1 tsp. rose extract

(D)
1 tsp. milk

Method:


In a large bowl, beat (A) with an electric mixer until fluffy. Add (B), beating well until when pressed with fingers, it stick together. Fold into a disk with your hands and separate the dough into half.  Mix one half of the dough with (C) and knead until even.  Mix the other half of the dough with (D) and knead until combine.  Covered both doughs with a plastic wrap and refrigerate the dough for 1 hour.

Rolled out both of the doughs.  Place the rose dough on the surface, layer the white dough on top.  The dough might be soft and break easily, so use a scraper to help you along.  Roll it like a Swiss roll style.  Or you can alternate with white dough first and layer with rose dough on top and roll it out Swiss roll style.  Cover with plastic wrap and put in the freezer for 30 minutes.
 
Preheat oven to 350'F. Take it out and cut it into 1/2 cm thickness and place on a parchment paper on a cookie sheet and bake for 12-15 minutes, or until edges were slightly golden. Remove to cool on wire rack.  Store in air-tight container.


For me, it yield about 64 cookies.


Friday, August 13, 2010

Steamed Eggs with Topping


I didn't know how to steam a smooth eggs before but now I know.  I learned it from watching the Chinese cooking show.  I have been watching the CCTV 4 "Everyday Food" Chinese cooking show and learned some cooking tips from there.  I learned this steamed eggs with topping from that show as well.  Have been seeing two different Chinese chefs making this dish with their variation of topping and find it doable!  I have not seen people steamed eggs this way before, we normally steamed it plain or with minced pork or with salted egg or thousand years old egg in Malaysia.  So, this way of serving is new to me.  The chefs guarantee this way of steaming eggs will produce a smooth and silky soft eggs and they made it seem so easy so of course I had to try it myself.


Well, they were right, it is really that easy to produce a smooth and soft steamed eggs.  Now I have a new dish to prepare for my family.  We all loved this easy dish and with the topping, I can even make it a one dish meal.  This dish is suitable for young and old alike as the steamed eggs make it easy to swallow.


Ingredients:

3 large eggs

Topping:
10 large shrimps, each shrimp cut into 4 pieces
1 small carrot, cut into small cubes
1/4 cup frozen green peas
2 cloves of garlic, minced

Seasonings: salt, sugar, white pepper, chicken stock granules.

Sesame oil and cornstarch water (cornstarch:water, 1:2).

Method:

1.  Beat the eggs and add some water, Eggs to water amount is 1:1.  Season with salt and white pepper. Beat again and strain into a 9" Pyrex pie plate.  Cover with a cling wrap and steam on high heat for 8 minutes.  Set aside.

2.  While steaming, prepare the rest of the ingredients.  Heat up a wok, when heated, add in a little oil.  Add in garlic and shrimps, stir-fry a little, add in carrot and green peas, stir-fry well.

3.  Add in some water (about 1/2 cup) and seasonings.  Stir well.  Add thickening (cornstarch water) and lastly a dash of sesame oil to finish.  Pour the thicken sauce on top of the steamed eggs to serve.

Wednesday, August 11, 2010

Edda Drawings Update

Remember I was complaining about Edda's drawings not long ago?  Click on the highlighted words to see her previous drawings.  And two months later, she surprised me with her flowers drawing.  That was her first real drawing that she had shown me and of course I had to save it.  I was really surprise because it looked so beautiful to me.  I praised her for her excellent drawing and after that, she started to produce drawings after drawings and they were not abstract anymore.  Wow right?  Look at her drawings below, I think it was real impressive and what a fast change, I was worry about nothing.  She started to draw these at 3 years and 9 months old.
 

Flowers by Edda, July 17, 2010

Garden by Edda, July 25th, 2010

Family by Edda, August 3rd, 2010

Drawing by Edda, August 9, 2010


Monday, August 9, 2010

Pan-Fried Mahi-Mahi in Ginger Soy Sauce


This is a pretty common way of cooking fish in my household.  I created it almost 16 years ago.  I remembered when I first cooked this dish for my parents and sibling 15 years ago when I went back to visit them.  My dad asked me what was the topping?  Okay, I did it slightly different, I added chopped garlic and chopped ginger, the ginger were not in slices back then.  I was surprised back then that he would ask me such a question so til this day, I still remembered it.  The reason being my mom didn't cook him this dish before, so he didn't know what was the topping.  So I had to explain to him what it was and he was supposed to take some of the topping with the fish and eat it with the sauce and rice.  I thought it was real interesting.

Next time when I go back, I need to make an effort to cook for them again.  I didn't do that the last few times because it was too hot, also my girls were little back then.  I really need to make an effort to cook for them.


If you want the recipe, click here.  But instead of using dark soy sauce, I used soy sauce in this, thus the lighter in the sauce color.  I think I added too much water too, or you can thicken it with cornstarch water.  And of course, if you think the ginger amount is too much, use as little as you like.

Friday, August 6, 2010

Chinese Snow Fungus Herbal Soup


Snow fungus (雪耳) can also be called silver ear fungus (银耳) or white wood ear fungus ( 白木耳).  It is just like the name implied, it is a species of fungus, white in color that grows on dead attached and recently fallen branches of broadleaf trees.  It is widely available in the tropics and is cultivated for used in Chinese medicine and Chinese cuisine.  White fungus contains much iron, vitamin C, calcium and phosphorus. It is said to be effective in nourishing the lungs, healing dry cough and clearing heat in the lungs.  We used it in sweet and savory dishes.  Most common dessert would be white fungus stewed in rock sugar with red dates and dried longan.  But I liked mine in savory herbal soup.

I think I didn't boil mine long enough as my snow fungus was crunchy instead of soft.  Is there any other way to make the snow fungus soft besides soaking it in warm water and long simmering time?  


Ingredients:

Pork ribs, about a bowl
Snow fungus, about 2, soak in warm water overnight to soften, cleaned
Dried scallops or dried oysters, rinsed
Yellow beans, about 1/4 cup, soak for 1 hour
Dried red dates, about 10
Dried longans, about 8
Dried Polygonatum (Yok Chook), about 10-12 pieces
Salt to taste before serving


Method:


1.  In a pot, add pork ribs and cold water just enough to cover the pork ribs, let it boil for 2-3 minutes, drain and wash the pork ribs.

2.  Add in 1500ml water in a pot, let it boil, add in the cleaned ribs, dried scallops, snow fungus and the rest of the ingredients.  Turn to low heat and let it simmer for 2-3 hours or until the ribs are tender and fall off the bone.  Season to taste with salt before serving.

Tuesday, August 3, 2010

Water Chestnut Jelly Cake


If you have been reading my blog, you probably aware that I did this before but the plain version.   With the yellow rock sugar that I used, my water chestnut cake turned out white, not the result that I was looking for.  So, this time I played with the recipe and used Malaysia's Gula Melaka and added the chopped water chestnuts.  It turned out so much better, love the fragrant of Gula Melaka that I could taste with each bite as well as the added crunch from the water chestnuts.  It is really refreshing eaten it cold straight from the refrigerator.  I prefer this instead of pan-frying it with batter, less grease thus healthier.

This will be the way I am making this in the future until I am out of the Gula Melaka, then the other substitute that I could think of will be the Chinese brown sugar in bar shape.  That would give me the color that I want but with different fragrant.


Ingredients:

250g water chestnut flour (馬碲粉)
500ml water
1 5oz (141g) canned of diced water chestnuts
750ml water
350g  Gula Melaka

Method:

1. Open the canned of diced water chestnuts, drain, lightly rinse and chop into desired pieces.
2. Mix water chestnut flour with 500ml water and whisk to mix well.  Set aside.
3. Boil Gula Melaka with 750ml water until sugar dissolve. Add in the chopped chestnut pieces.
4. Pour water chestnut mixture into Gula Melaka solution and keep stirring until it turns transparent and thick.
5. Pour the thicken chestnut mixture into a well greased 8 inch pan.
6. Steam on high heat for 30-45 minutes.
7. Let it cool at room temperature and then cover with a plastic wrap and keep in the refrigerator for at least three hours.  Preferably overnight.
8. Slice and serve it cold.