Showing posts with label Dessert. Show all posts

Sunday, August 22, 2010

Nagaimo Mung Bean Dessert


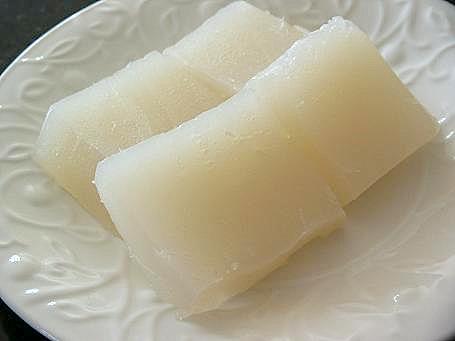
Nagaimo is also called 山药 or 淮山 in Chinese.  It is a type of yam that can be consume raw.  It has long been traditionally used as Chinese medicine and herbology.  They cut it and dried it in pieces for cooking Chinese herbal soup.  It's the white color herb that we called it 淮山.  I just learned that it has other name which is 山药 from my Chinese friends.  I learned this dessert from them as they gave me a container to try.  It was my first time tasting fresh Nagaimo, frankly I didn't like it as they cut it into big chunks.  It was similar to potato in taste but full of potassium, magnesium, zinc, vitamin C, vitamin B1, and more.  It is also low in calories and a high protein tuber.  I saw a Chinese cooking show, where they put cubed and blanched Nagaimo and Pumpkin into heated milk and serve it as breakfast.  Usually you can cook it like what you would normally cook a potato dish.


You can read more about Nagaimo here. And more about the nutritional facts here.

In this dessert, I diced the Nagaimo into small cubes so that it was easier for me.  Since I cooked it in a slow cooker, some of the Nagaimo was blended into the soup when stirring.  It still have pieces of Nagaimo but quite pleasant since it was not in big chunks.  Definitely a dessert I will be cooking if I buy Nagaimo again.


Ingredients:

Nagaimo, a segment of it (more or less depended on how much you like it)
1 cup of mung beans
A small piece of ginger, peeled and chopped into tiny pieces or leave it in big piece and smashed it if you want to take it out after cooking
Rock sugar to taste
Water to cover double the amount

The water amount that I used

Method:

1.  Peel the Nagaimo with a peeler (careful when holding it because very slimy and slippery), then rinse with tap water.  Diced into small pieces (you can cut it into bigger pieces if you like to eat it in chunks).

2.  Wash by rinsing the mung beans several times until the water is cleared.

3.  In a slow cooker, add in mung bean, chopped ginger, Nagaimo and cover with water.  Slightly more than double the amount.  Turn to high and let it cook for 3-4 hours, or until the mung beans are broken out.

4.  Add in rock sugar to taste.  Stir or wait until sugar dissolved.  Mix some potato starch with water, stir to mix well.  Slowly add into the dessert and stir until thicken.  If not thick enough, add more potato starch water.

5.  Good serving it warm or cold.  Keep the leftover in a container in the refrigerator to enjoy it cold.  Refreshing during Summer.  Or keep warm in the slow cooker to enjoy it warm.

Note:  You can cook this on the stove too, just have to keep watch.

Tuesday, August 3, 2010

Water Chestnut Jelly Cake


If you have been reading my blog, you probably aware that I did this before but the plain version.   With the yellow rock sugar that I used, my water chestnut cake turned out white, not the result that I was looking for.  So, this time I played with the recipe and used Malaysia's Gula Melaka and added the chopped water chestnuts.  It turned out so much better, love the fragrant of Gula Melaka that I could taste with each bite as well as the added crunch from the water chestnuts.  It is really refreshing eaten it cold straight from the refrigerator.  I prefer this instead of pan-frying it with batter, less grease thus healthier.

This will be the way I am making this in the future until I am out of the Gula Melaka, then the other substitute that I could think of will be the Chinese brown sugar in bar shape.  That would give me the color that I want but with different fragrant.


Ingredients:

250g water chestnut flour (馬碲粉)
500ml water
1 5oz (141g) canned of diced water chestnuts
750ml water
350g  Gula Melaka

Method:

1. Open the canned of diced water chestnuts, drain, lightly rinse and chop into desired pieces.
2. Mix water chestnut flour with 500ml water and whisk to mix well.  Set aside.
3. Boil Gula Melaka with 750ml water until sugar dissolve. Add in the chopped chestnut pieces.
4. Pour water chestnut mixture into Gula Melaka solution and keep stirring until it turns transparent and thick.
5. Pour the thicken chestnut mixture into a well greased 8 inch pan.
6. Steam on high heat for 30-45 minutes.
7. Let it cool at room temperature and then cover with a plastic wrap and keep in the refrigerator for at least three hours.  Preferably overnight.
8. Slice and serve it cold.


Tuesday, July 20, 2010

Fruit Pastry using Puff Prata/ Pratha


Summer came with abandon of fresh berries, peaches, nectarines, melons, mango and all were on sales.  My house was fulled of all sort of fruits.  My hubby bought some nectarines but it were sour and soft and I bought some plums and it were sour as well.  So, all these sour fruits had been left in the refrigerator uneaten as the sweeter fruit would be chosen.  I had been thinking of a way to eat these fruits since I don't like to waste food.  Was thinking to make them into the fruits pastry cake but I was a bit lazy to make the cake.  Then, an idea came when I remembered I still have two pieces of frozen roti puff pratha in the freezer.  Thus, this fruit pastry was created.  Out of convenient and not wanting to throw away sour fruits.

I will show the step-by-step picture in the next page with the simple recipe.


First, cut and core the nectarines and plums, put them in a bowl.  Add in some blueberries and sweeten them with sugar and cinnamon (optional).  How much sugar to add depends on how much fruit you have and how many fruit pastry you are going to make. Stir to mix well.  Set aside.  [I used 4 nectarines, 2 plums and 1/2 cup of blueberries, used about 4-5 Tbsp. of sugar.] Take out your frozen prata/pratha and let it rest at room temperature until soften.

Second, place the soften prata on a Slipat or parchment paper.  Stretch it out a little bit, add in the filling like above picture.


After that, pull the prata over some of the fruit, like a blanket.  Brush the puff pastry with egg wash (from one beaten egg).


Lastly, bake it preheated 400'F oven for 25-28 minutes or until golden brown.  You can serve this with sprinkle powder sugar on top.  Good when it's still warm or at room-temperature.  Of course, you can use frozen puff pastry or filo papers for the wrapping as well.  You can also serve it with whipped cream or vanilla ice-cream. 

Verdict:  Everyone loved it!  Great way to dispose of the sour fruit and make such a great dessert presentation too.

Wednesday, June 16, 2010

Chinese Water Chestnut Cake


My friend gave me three packets of water chestnut flour recently.  I wanted to try this Chinese water chestnut cake for a long time and finally I got my chance.  The above is my Chinese water chestnut cake without the bits of chestnuts.  I didn't have the water chestnuts but decided to make it anyway.  It turned out pretty good I think, tasted like cold jelly straight from the refrigerator.  I will certainly play with this recipe in the future because I saw others people water chestnut cake in yellow color instead of white.


This cake is actually served during Chinese Lunar New Year by Chinese, depended on where they are located.  I don't think we Malaysian eat this during Chinese New Year.  I pan-fried this with the equal mixture of flour: rice flour.  The batter was really crispy!


This recipe is graciously shared by Florence.  I changed it a little bit.

Ingredients:
250g water chestnut flour (馬碲粉)
500ml water
600g fresh water chestnut (I omitted this)
750ml water
300g - 400g rock sugar/golden rock sugar (I used 400g)

Method:
1. Wash fresh water chestnut thoroughly and cut or crush them into your desired size. (I omitted this step)
2. Mix water chestnut flour with 500ml water and strain for use later.
3. Cook rock sugar with 750ml water till sugar dissolve. Add in the crushed chestnut pieces.
4. Pour water chestnut mixture into rock sugar solution and keep stirring until thicken. (Keep stirring until it turned transparent and gluey)
5. Pour the thicken chestnut mixture into a well greased 8 inch pan.
6. Steam on high heat for 30 minutes.

Note:  You have to let it cool in room temperature and then let it set in the refrigerator.  It will harden and turned jelly like after that.

Thursday, March 11, 2010

Red Beans & Black Glutinous Rice Sweet Soup


This is one delicious sweet soup I discovered by accident.  I was planning to cook some red bean soup with orange peels.  And then I remembered my mom used to add a handful of white glutinous rice with hers.  Some people added some dried longan too.  But I did not want the dried longan in my sweet soup and while trying to take out my shell pasta to cook noodle soup, I spotted my black glutinous rice.  I was thinking why not I used the black glutinous rice instead of white since it was considered to be healthier.  So, I used the black glutinous rice along with my red beans and dried orange peels and set my slow cooker to low and was really surprised at how tasty it was the next day.  It was so delicious that I would cook this way often from now on.

I love to cook red beans and black glutinous rice in my slow cooker overnight, because I will be rewarded with a soft and gluey and delicious sweet soup in the morning, without fail.   I liked mine soupy thus I added a lot more water.


Ingredients:

3/4 cup red beans, washed
1/2 cup black glutinous rice, washed
3-4 dried orange peels

Rock sugar to taste

Method:

1.  In a slow cooker, add in red beans, orange peels and black glutinous rice.  Add water until it reaches half of the slow cooker (or slightly less than half).  Turn it to low (8 hours) and go to sleep.  This is a soupy version, if you like it thicker, add less water.

2.  The next morning,  give it a stir and add in rock sugar to taste.  Stir until rock sugar dissolved and turn it to warm.  Enjoy it as morning breakfast and throughout the day.


Sunday, January 17, 2010

Sweet Lily Buds and Lotus Seeds Soup


This is a pretty common Chinese sweet soup in Malaysia. I know I didn't like this soup when I was little or when I was back in Malaysia. It is just not my thing especially the lotus seeds and lily buds, not something that youngster would like. But as I got older, my taste bud changed as I am more into healthy food these days or food that would provide benefit to my body as to the opposite. I came into this soup again and the benefits of drinking this simple soup really changed my mind about this soup. This soup is said to be supporting heart, nourish kidney, fight memory loss, insomnia, loss of appetite, nourish brain especially for students or white collar workers who need to use brain to think a lot and anti-aging. I believed in Chinese medicinal soup for prevention and overall body wellness so I guess I will cook this sweet soup frequently from now on. Yeah, I thought my girls wouldn't like this soup but surprisingly they both loved it, even finishing all the lotus seeds, longan, wolfberries and lily buds I gave them. I seriously thought they wouldn't eat the lotus seeds and lily buds like when I was young.


Ingredients:

15g dried lotus seeds
15g dried lily buds

10g wolfberries (Goji berries/ Ke chi)

12 red dates

12 dried longan

800-1000 ml water

Rock sugar to taste


You can add 1 or 2 beaten eggs if you like (optional)


Method:

1. Rinse lotus seed, lily bud, red dates, wolfberries, dried longan under running water. In a pot, add in water, let it boil. When boiling, add in the rest of the ingredients except rock sugar.

2. Turn the heat to low and let it simmer for 2 hours. Add in rock sugar to taste and continue simmering for 10 minutes.


3. Add in beaten eggs (if used) to create egg drop soup effect before serving.


Friday, October 2, 2009

Duo Colors Marbled Tang Yuan (Glutinous Rice Balls)


I saw this recipe on CCTV4 TV food program, "Everyday Food" and thought what an excellent idea! Thought I share it with my readers here, so we will have another way to serve our favorite dessert "Tang Yuan". As I mentioned earlier, in order to incorporate more diary into the Chinese families diet, they have used fresh milk in cooking and making dessert. Usually we used water to make glutinous rice balls but for your own family consumption, you now have the option to use fresh milk for extra nutrient, what an excellent idea right? Also, I never thought that I can add cocoa powder into making my glutinous rice balls too, we usually just use the different colorings. Can you tell, I really learned a lot from this episode. It looked too pretty not to try it out especially all of us adored "Tang Yuan". So, I gave it a go and really liked it, you can give it a try too!

I want to wish my readers a "Happy Mid-Autumn/ Moon Cake Festival" too! Enjoy the mooncakes, food, full moon and good company!


Ingredients:

White dough:
glutinous rice flour + milk

Brown dough:
glutinous rice flour + cocoa powder + milk

Filling:
Red bean paste, roll into ball shape

Syrup:
Water + Gula Melaka (or brown sugar) or (1 cup water + 1 cup sugar + a drop of almond extract)


Pictures Guide:

Lay the brown log shape dough side by side with the white log shape dough.


Twist them together.


Cut it into pieces.


Flatten each piece with a roller or hand and place red bean paste in the middle. Close it and make into ball shape.


Like this. Very pretty right? :-)

Method:

1. In a bowl, add in white glutinous flour and a little milk at a time. Knead until a dough is formed. In another bowl, add in white glutinous flour + a little cocoa powder + milk (a little at a time) and knead until a dough is formed. At the meantime, also roll the red bean paste into balls for easy filling.

2. Roll each dough (white and brown) into a long log shape and intertwine both together. Cut into pieces. Take one, roll into flat circle and put filling inside, close it and roll into a ball shape. Finish the rest.


3. Bring a pot of water into a boil. When boiling, add the glutinous balls into the boiling water. When it floats to the top, dish out and place into individual bowl. Dissolve some Gula Melaka (or Chinese brown sugar) with a piece of ginger as Syrup for the tang yuan. Or just plain syrup with a drop of almond extract (optional) (1 cup water + 1 cup sugar + a drop of almond extract).


Wednesday, August 26, 2009

My Sweet Malaysia: Red Bean Soup Dessert with Sago and Glutinous Rice Balls


It's the Merdeka Open House 2009 event hosted by Babe in the City again. She has been hosting this event for the past couple of years and I am glad to be a participant in this. This year the theme is My Sweet Malaysia and we have to cook up some traditional sweet dessert based on our ethnic group. I picked this red bean sweet soup with sago and glutinous rice balls. Red bean dessert has been very traditional but over the years lots of different ingredients have been added to make it a little different and here is my version.

This is a short read extracted from wikipedia on red bean soup:

In China, red bean soup is a popular dish. The soup is commonly thinner than the Japanese oshiruko version. It is categorized as a tang shui, (literally translated as sugar water), or sweet soup. It is often served cold during the summer, and hot in the winter. Leftover red bean soup can also be frozen to make ice pops.

It is one of the main desserts offered after Cantonese cuisine meals in restaurants at night. When served, it is plain most of the time. The fancier restaurants may offer red bean soup with sago (西米). The two types of sugar used interchangeably are rock sugar and sliced sugar (片糖).


Since the older generation of Malaysian Chinese were immigrated from China, this red bean soup had been adapted in Malaysia and became one of the traditional and common dessert nowadays.


Ingredients:

1 to 2 cups red beans, soak overnight for fast cooking

1/4 to 1/3 cups Sago

1 cup glutinous rice flour + enough water to make a dough

Brown sugar or Rock sugar or Gula Melaka
to taste
1 piece of tangerine peel

Water


Coconut cream (optional)


Method:


1. In a saucepan, boil it with water. When boiling, add in the amount of sago that you want (1/4 or 1/3 cup). Stir and let it boil for 10 minutes. Turn the heat off and cover and let it sit for 15-20 minutes or until sago turned transparent. Rinse in a sieve under cold running water, set aside.


2. In another large saucepan, add water of your choice, boil it. When boiling, add in red beans and tangerine peel and let it simmer for about 2 hours or until soften. Then, dish out the tangerine peel and add in sugar of your choice to taste.


3. While waiting for the red bean to cook, can make the glutinous rice balls. In a bowl, add in the glutinous rice flour, add a little water at a time until a dough is formed. Pinch and roll the dough into small balls, set aside. Boil another saucepan with water. When boiling, add in the glutinous balls in batches. When float to the top, dish it out and place in cold water. Set aside.


4. When the red bean soup is done. Add in the sago and glutinous rice balls. Stir to mix well. Before serving, can add in a dollop of coconut cream, stir well and serve for thicker texture and fragrant. I omitted the coconut cream. Serve hot or at room-temperature. I won't recommend you to put it in the refrigerator as the glutinous rice balls will turn floury and hard (not a good eat).


Happy 52nd years of Independence Malaysia and please visit BabeKL's blog on August 31st for the round up of the highly anticipated event: My Sweet Malaysia. Thank you.

Monday, August 17, 2009

Cantaloupe Sago Summer Drink


I have been seeing this dessert circulating around the Web in recent years. I never make an attempt to make it mainly because some called for coconut milk. Then, some was made with evaporated milk but I hardly stock this in my pantry. And it just happen that I have some condensed milk in my refrigerator so "tada!", why not I used condensed milk instead, got some milky flavor and sugar in one. This drink indeed refreshing especially good during Summer when cantaloupe, honeydew and mango are at its cheapest. Very cool and refreshing drink to serve as a drink or dessert during the hot summer days. My girls and I loved it but not my hubby, he said why wasted a cantaloupe for this? *fume* <---me!


Ingredients:
1 cantaloupe, separate
1 cup water

4 tsp. condensed milk

1 cup crushed ice

1/4 cup mini sago pearls/ tapioca pearls


Method:


1. In a small saucepan, boil water. When boiled, add in tapioca pearls, boiled for 10 minutes uncovered, then turned off the heat, covered and let it sit for 15-20 minutes or until the tapioca pearls turned transparent. Drain in a sieve with cold running water. Set aside.


2. Cut the cantaloupe in chunks for blender and reserved 1/4 (cut into small cubes) to add in later.


3. In a blender, add in water, chunks cantaloupe and condensed milk. Puree and blend until fine, add in crushed ice and blend until smooth.


4. Pour mixture into a serving bowl, add in tapioca pearls and cubed cantaloupe. Mix and serve cold.


5. Keep leftover in the refrigerator.


Friday, July 3, 2009

Cheesecake Cups


I loved to buy cream cheese when it was on sales, just for the "just in case" I need it moment. Then, often time because of my laziness, the cream cheese will left untouched. I really need to do something before the cream cheese past the expiration date and I found this mini cheesecake cups very easy. I used my roasted edamame cookies as base for these cheesecake cups, if you asked me, any round cookies would do. Then prepare an easy cheesecake mix and it was all set. I would recommend you to decorate the cheesecake cups as you desired as it will make it prettier and more presentable. ;) This is definitely an easy party dessert or treat for little kids.
I like the bite size serving too!


Plain ones


Ingredients: (Yield 12 cheesecake cups)

Base:

Round cookie of your choice (Nilla wafers, chocolate chips, butter cookies, etc.)


Cheesecake topping:

1 pkg (8oz) cream cheese, soften

1/4 cup sugar

1/2 tsp. vanilla extract

1 large egg


With strawberry preserved

Method:


1. Lined paper cups in muffin pan. Add in round cookie of your choice.


2. In a mixing bowl, add in cream cheese, sugar and vanilla, beat with an electric mixer until blended. Add in egg and mix until blended. Spoon cream cheese on top of each cookie cups, divide among 12.


3. Bake at preheated 350'F for 13-15 minutes or until center is almost set. Cool. Refrigerate for at least 2 hours. Decorate with gels, sprinkles, fruit preserved, chocolate syrup, whipped cream if desired. Store in refrigerator.

Friday, June 12, 2009

Sweet Potatoes Sago Dessert


We loved this dessert. When the sweet potatoes is on sales in the supermarket, I will buy some to make this dessert for my family. It is like killing two birds in one stone. I get to enjoy the Chinese brown sugar with ginger drink with the super food sweet potatoes! I will cook a big pot and enjoy it for couple of days. A small bowl for afternoon snack and another one after dinner. Ha! I think I will gain a pound or two whenever I cook any Chinese dessert. :P

Ingredients:


2 sweet potatoes, cut into cubes
1 cup tiny size sago (sago pearls, available in Asian store)

6 slices of thinly sliced gingers

Chinese brown sugar to taste

Water to cover double the amount of sweet potatoes


Method:


1. Rinse sago under water. Heat a saucepan with water, more than triple the amount of sago and let it boil. When boiled, add in sago and stir to separate. Turn the heat to low and let it boil for 10 minutes. Then, turn the heat off, cover the saucepan and let the sago to continue to cook for another 15 minutes. It should turn transparent after this. Rinse the sago in a fine large sieve under cold running water to separate them. Put on a bowl and set aside.


2. Boil another pot of water until boiling. Then, add cubed sweet potatoes and ginger slices, turn the heat to low, cover and let it simmer for 20-25 minutes or until the sweet potatoes have soften (test with a fork). Then, add in Chinese brown sugar to taste. Stir until sugar dissolved, turn the heat off and add in sago pearls, give a little stir. Keep leftover in the refrigerator, it is nice eaten cold too.

Friday, May 1, 2009

Reduced Fat Panna Cotta


We loved panna cotta but it was so fattening. So, I was trying to cut down some of the saturated fat in this delectable dessert by cutting down on the heavy cream and used whole milk. I placed it in a jelly mold which was probably not the best idea as it was stuck to the mold. I had to use the satay stick to scrape it down, thus the broken design. Despite the ugly look, it tasted divine. Still fattening but a reduced fat version.


I modified some of the ingredients from this recipe. Next time I would probably use 55g palm sugar in (A) and skip the whole syrup step.

Ingredients:


(A)
1 1/2 cup whole milk

1/2 cup heavy cream

20g palm sugar


7g powder gelatin + 1/4 cup water


For syrup:

40g palm sugar

1/4 cup water


Method:


1. Add (A) in a pot and bring to boil, stirring to dissolve the palm sugar. Remove from heat.


2. Combine gelatin and water and add into the pot. Stir until gelatin is dissolved.


3. Place the pot into a container that contains ice cube and cold water and stir the mixture until it cool.
(I omitted this step)

4. Divide the mixture into cups and place in refrigerator to harden.


5. For the syrup, add palm sugar and water into a pot and bring to boil. Stir to dissolve the palm sugar.


6. Before serving, add some syrup on the panna cotta.

Monday, April 6, 2009

Red Bean Konnyaku Jelly


I was in the mood for some jelly and red bean jelly to be exact. The only jelly powder I had in my pantry was Konnyaku jelly powder, so Konnyaku jelly it was. I bought some mooncake jelly molds when I was in Malaysia last year so I thought this would be the perfect time to use it or open ceremony with it like we Chinese said. I do love this molds, making the jelly looking ultra cute. I wanted to make a red bean jelly because I had a canned of red bean and making a red bean jelly was much easier than making a red bean kuih even though both tasted great. Also I got to use my new jelly molds. :)


Here's my easy, refreshing and delicious red bean jelly recipe. No pre-cooking of red bean required. ;)

Ingredients:


(A)
One packet of Redman Konnyaku jelly powder (10gm)

3/4 cup sugar


750ml water

200ml whole milk (you can use skim or 2%)

One 475g (16.75oz) canned whole red bean (shelled) for dessert topping


Method:


1. In a bowl, mix (A) together and whisk to combine. Set aside.


2. In a medium pot, add 750ml water to boil. When boiling, add in (A). Whisk until sugar dissolved. Add milk and red bean, whisk to blend well.


3. Pour into jelly molds of your choice. Let it cool at room temperature before transferring it to harden completely in the refrigerator. Roughly 2-3 hours.
Serve chilled.

Friday, March 13, 2009

Chinese Peanut Soup Dessert (花生糊)


This is one of the desserts serving in the Chinese restaurants. I vaguely remember this dessert until I was served this while dining at a Chinese restaurant in Denver two years ago. Yeah, it was a while back as recently I have no luck in getting this as a free dessert anymore, usually it was either green bean with sago or red bean soup. In case you were wondering, few Chinese restaurants in Denver give free tea and dessert at dinner and free tea, soup and sometimes jelly/oranges for lunch. Not bad yeah?

That one time seem to be embedded deep in my memory as I couldn't forget this delectable dessert. I remembered I used to have this dessert at the wedding banquet in Malaysia ages ago. Not sure whether they still serve this as one of the wedding banquet desserts today or the more fancy kind? Anyway, because I wanted to eat it again so I have to make it. I just made a batch of toasted ground peanuts for my Vietnamese sauces earlier and kept it ready in the freezer. So, I thought I can used that to make my peanut soup. Thus, I made it my short cut way and it was really good, not too sweet, just nice. Of course if you like it sweeter just add more sugar to taste.


One big pot to serve for 3 days!

Ingredients: ~Serves 6-8

(A)
1 1/2 cup toasted ground peanuts (skinless)
1 oz. (about 25 small) dried Chinese red dates (pit less), soak in hot water until soft

2 cups water


(B)

1/2 cup packed brown sugar

1/4 cup white sugar

4 cups water


(C)

3 Tbsp. cornstarch

3 Tbsp. water

~Mix both together in a small bowl

Method:

1. In a blender, chop, mix, stir or puree (A) until smooth. My blender has chop, mix, stir functions and I had to use those to make a smooth paste.

2. In a cooking pan, add in mixture (A) and (B). Bring to a boil at medium heat. Keep whisking with a whisk. Turn off the fire, add (C) and keep whisking to thicken.
Serve warm. Keep the leftover in the refrigerator and heat it up in the microwave to serve.

Tuesday, December 30, 2008

Tau Suan with Gula Melaka


I have some leftover Gula Melaka syrup from the Tang Yuen (glutinous rice balls) and whenever I have some leftover syrup, I will make another dessert to go with it. Gula Melaka is scarce here so throwing it away is a no no. So, having some green beans, mung beans or red beans in my pantry is just perfect for situation like this. *Sign* Don't we wish we have the luxury like our fellow bloggers in Malaysia or Singapore, then I would love to have some cut "You Tiao" (Chinese fried cruller) with my tau suan (mung beans dessert). For my tau suan recipe, click here.

I truly miss the salty ham chim peng with five spice powder, or sweet ham chim peng, the one that looks like 8 and the one with glutinous rice in the middle! When I go back, I love to visit the morning market for all these fried stuff, but then I would be attracted to the other kuih stalls, and then nasi lemak and so on. I get really greedy as I want to eat everything but I know I have to control myself because 10 pounds is the most I can gain. Our dilemma of going home, want to eat yet afraid to eat too much. (Sigh!)

Sunday, December 21, 2008

Happy Winter Solstice


Today is Winter Solstice festival or Dong Zhi “冬至节”. Chinese celebrating this day by having a reunion dinner and eating tang yuan (glutinous rice balls in sweet syrup). I always make tang yuan on this day, have been doing it for years so it's like a custom already. This year I made Pandan flavored tang yuan with Gula Melaka syrup.

I actually made a mistake because I was out of glutinous flour and I added too much water, so the dough was too wet. So I had to use some rice flour to make the dough pliable. In my mind, I was hoping that it works because throwing away the dough was too wasteful , also Evy was too eager to help and eat the tang yuan. In fact, she has been bugging me to make tang yuan and I always postponing her by saying wait until Winter Solstice day. So, I can't possibly disappoint her again. Luckily it still works! The shape is not as round as I prefer but taste wise it is still very similar to tang yuan texture.

Now, wishing everyone in U.S.A a Happy Winter Solstice Festival (as Malaysian celebrated it yesterday).

Tuesday, August 19, 2008

Shaved Ice Again (Ice Kacang)


It's summer and the best way to cool off is to have some shaved ice or ice kacang. Making shaved ice is so easy these days when you own the shaved ice machine. It comes in two forms, electric or hand power. I bought an electric one few years back and it's really useful.


I used canned sweeten red beans, canned peaches and canned green jelly so making this is really easy. All I have to do is make some Gula Melaka syrup to put on top of the shaved ice. Oops! I forgot to add the evaporated milk, no wonder it didn't taste as fragrant. :P

Thursday, August 14, 2008

Black Glutinous Rice Dessert (Bubur Pulut Hitam)


This is my black glutinous rice takes three! Yes believe it, my third time making this dessert only. Can you tell how lazy I am? I tried the rice cooker and stove method, I tried straight from the stove method (takes very long to make the rice soft) and my third time was a charm. I used my lazy slow cooker method!

Here's how I did mine:

2 cups of black glutinous rice (soak in water for at least 8 hours)
3-qt. water
1 cup white sugar

Coconut cream to serve

One 4-qt. slow cooker/crock pot

Method:


Place washed black glutinous rice in the crock pot and cover the crock pot with water (half). Turn the switch to low. I let it cooked overnight, should be ready in 8 hours. I only checked on it at 12 hours so it developed a ring of harden black glutinous rice in my crock pot. Other than that, it's perfect (so I guess it should be stir once in a while to prevent that). After it's cooked, add sugar and stir to mix well and of course turned off the crock pot. Serve with a dollop of coconut cream, stir and enjoy! *Add more sugar if you prefer it sweeter*


Thick and gluey bowl of sweeten black glutinous rice is ready to be enjoyed! This is really bubur pulut hitam, it's so soft it turned into bubur (porridge) already! Surprisingly both Evy & Edda love this gluey & sticky black dessert!